The glow journal
Insights, advice, and a little glow inspiration — straight from the source.
.jpg)
The ultimate holiday glow guide

Introduction
Let’s be honest. The holidays are better when you look and feel your best. Between Christmas parties, family gatherings, winter getaways, and festive photos, this season is filled with moments where you naturally want to look radiant and confident. But with Alberta’s cold weather, dry air, and lack of sunlight, most of us enter December feeling pale, dull, and dehydrated, no matter how much skincare we use.
A holiday glow changes everything. Whether you are heading to a warm destination or staying home for the Christmas season, building your glow early makes winter feel brighter, warmer, and more effortless. With the right preparation, you can step into the holidays with skin that looks even, refreshed, and naturally luminous.
Why a holiday glow matters
It is not about looking tanned. It is about feeling healthy, warm, and vibrant during the darkest time of the year, when your skin often feels the opposite. A steady glow can bring life back into your complexion and help you feel more energized and confident during the busiest social season.
A well built glow can:
- Brighten dull winter skin by adding warmth and dimension that counteracts December dryness.
- Create a soft, even colour that looks beautiful in seasonal photos, evening lighting, and holiday outfits.
- Boost confidence for parties and gatherings where you want to feel polished, comfortable, and camera ready.
- Prep your skin for a tropical getaway by allowing your skin to adjust to gentle UV exposure before stepping into stronger sun.
- Help prevent burning if you are travelling south, giving your skin a head start before you are exposed to higher UV levels.
A glow adds depth and warmth to your skin tone, complementing everything from cozy sweaters to festive makeup looks. It enhances your overall appearance in a subtle way that feels fresh, not overdone.
Start earlier than you think
Winter skin takes longer to tan. It is naturally drier, paler, and more sensitive, which means you need more time to build colour safely and evenly. Giving yourself enough time ensures your results look smooth, natural, and beautifully layered rather than rushed or irritated.
For Christmas parties and events
Start 2 to 3 weeks before your first event so your glow has time to develop gradually and consistently.
For a holiday vacation
Start 3 to 4 weeks before you fly to allow your skin to adjust at a steady pace, reducing the risk of burning when you arrive somewhere sunny.
Trying to rush your glow last minute often leads to irritated skin, uneven patches, or colour that fades too quickly. Slow and steady always looks better and lasts longer.
No time to build a base glow
If time is not on your side, a spray tan is the perfect last minute solution. It offers an instant, perfected glow without needing weeks of UV buildup. Book 24 to 48 hours before your holiday party, photos, or event for a warm, seamless, photo ready glow with zero downtime.
Choosing the right bed for winter skin
At Arizona Tanning, every UV tier offers unique benefits for winter skin. Choosing the right equipment ensures your glow develops smoothly and safely, even when your skin is at its driest.
Bronze Tier
Perfect for beginners or fair skin needing gentle winter colour.
Corona T40
Builds natural, even colour at a comfortable intensity, making it ideal for clients wanting a subtle winter base.
Gold Tier
Ideal for clients wanting brighter colour and improved skin tone.
Corona Blush
UV paired with red light therapy for a fresh, radiant finish that adds brightness to winter skin.
KBL Pure Energy
Provides even, all over winter colour with no pressure points. Smooth, fast, and consistent for clients who want efficient sessions.
Platinum Tier
Great for experienced tanners or clients prepping for a warm-weather trip. This tier provides the deepest, longest lasting results.
KBL 6800
Luxurious, high intensity colour with advanced comfort features, perfect for building depth during cold months.
Saturn
Powerful, long lasting colour when you need fast results before your holiday escape, ideal for clients who want bold glow with fewer visits.
Pro tips for your best holiday glow
Hydrate constantly
Winter air is extremely dry, which means your skin loses moisture quickly. Well hydrated skin tans deeper, more evenly, and keeps its colour longer.
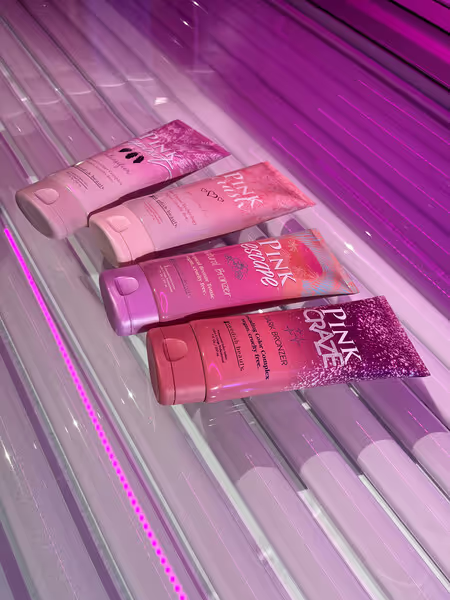
Use a professional tanning lotion
A quality indoor tanning lotion boosts your results by increasing your skin’s responsiveness to UV, preventing dryness, and enhancing colour depth.
Stay consistent
Two to three sessions per week deliver the most even, natural looking holiday glow. Consistency helps your skin maintain colour and supports healthy development.
Exfoliate and moisturize
Smooth skin develops better colour and holds onto it throughout the season. Gentle exfoliation ensures even application while daily moisture protects your skin barrier.
Finish with a spray tan for events
Even if you have a UV base, a spray tan adds that perfected, airbrushed finish for parties, photos, and special moments. It enhances your glow and elevates your overall look.
TLDR — Glow early. Glow gently. Glow smart.
Winter skin needs time, hydration, and consistency. Start early, build gradually, and choose the right equipment for your goals. Whether you are travelling, celebrating, or simply want to feel confident this Christmas season, we are here to help you create your warmest, brightest holiday glow. Glow now. Thank yourself all season.

Red light + UV: Why this bed is your skin’s new BFF
Introduction
What if you could get a beautiful, even tan and give your skin a little love at the same time?
That’s exactly what our Red Light + UV Corona Blush Bed delivers. It’s not just another tanning session — it’s a premium experience that combines the skin-rejuvenating benefits of red light therapy with the gentle, colour-enhancing effects of UV.
Here’s why this bed is your new go-to for a healthy, radiant glow that looks as good as it feels.
What is red light therapy?
Red light therapy uses non-UV light that penetrates below the surface to help improve your skin’s overall health, tone, and texture.
It’s been shown to:
- Stimulate collagen production for firmer, plumper skin.
- Reduce inflammation and promote healing.
- Improve skin elasticity and smoothness.
- Enhance radiance and even skin tone.
Think of it as a facial for your entire body — but one that also prepares your skin to tan more evenly and beautifully.

Why combine red light + UV?
Here’s where the magic really happens: when you combine red light with UV in one session, you get the best of both worlds.
- Healthier-looking skin, even colour.
Red light improves your skin’s condition so it absorbs UV more evenly — resulting in a smoother, more natural-looking tan. - A radiant, natural glow.
The blush effect from the red light brings blood closer to the surface, enhancing your natural colour and giving you that healthy, sun-kissed flush. - Skin-loving benefits beyond tanning.
Red light is also known to help improve certain skin conditions by calming inflammation and supporting healing. Many clients notice clearer, calmer skin over time — particularly if they experience mild acne, eczema, or psoriasis. - A gentle, skin-conscious experience.
Because this bed is designed to prioritize skin health and rejuvenation, the UV exposure is more subtle — making it perfect for anyone who wants a gradual, even tan without the intensity of higher-pressure beds.
Who is this bed for?
The Red Light + UV Blush Bed is ideal for:
- Clients looking for a skin-conscious, luxurious tanning experience.
- Those with dry, sensitive, or mature skin who want added rejuvenation.
- Anyone managing mild skin concerns like redness, breakouts, or irritation.
- Clients who prefer a softer, more natural-looking glow.
Pro tips for your best session
- Use a professional tanning lotion — we can recommend one that works beautifully with red light + UV.
- Stay consistent — the benefits of red light build over time, so regular sessions yield the best results.
- Hydrate your skin before and after — moisturized skin responds better and keeps your colour looking fresh.
The bottom line
If you’re ready to take your glow to the next level — and treat your skin while you’re at it — the Red Light + UV Blush Bed is waiting for you.
This isn’t just tanning. It’s skin care, self-care, and confidence in one beautiful session.
If you’re curious or want help incorporating it into your routine, just ask — we’d love to help you experience the difference.

Your bridal glow guide: Flawless skin for the big day
Introduction
Your wedding day is one of the most photographed moments of your life — and nothing ties the whole look together like skin that glows. The dress, the makeup, the photos... everything hits harder when your skin is even, radiant, and confidently you.
A bridal tan isn’t about looking extra bronzed — it’s about making your skin tone feel balanced, soft, and seamless with everything else you’re wearing. The right shade adds dimension under makeup, warmth in photos, and a kind of glow that doesn’t compete with the dress — it complements it.
Whether you’re after a soft airbrushed glow or a natural sunkissed tan, we’ve got options — and a timeline — to make it happen. Here's your guide to choosing the right glow, prepping like a pro, and avoiding any last-minute stress.
Spray Tan or UV Tan? Here’s what to know
Both can get you glowing, but they work differently — and the best choice depends on your timeline, skin type, and vision for the day.
Spray Tanning
Quick, customizable colour with no UV exposure.
Pros:
- Instant results (develops in 6–8 hours)
- Great for all skin tones, even very fair
- Easy to control the exact shade
- No UV exposure
- Perfect for last-minute colour boosts
Considerations:
- Requires a trial run — don’t risk first-timers the week of the wedding
- Needs specific prep (no lotions, makeup, etc.)
- Can transfer onto clothes if not fully set
- Timing is everything — usually best 1–3 days before the big day
UV Tanning
Gradual, natural colour that builds over time.
Pros:
- Long-lasting tan that fades gradually
- More resistant to water and sweat transfer
- Can increase sunscreen effectiveness and reduce burn risk on your honeymoon (when paired with SPF)
- Feels more like a “natural glow”
Considerations:
- Requires multiple sessions over several weeks
- Not ideal if you're short on time
- Not recommended for skin that burns easily
- Should still be paired with sunscreen — a base tan is not a sunblock
Bridal Glow Timeline: Spray Tan Edition
Your wedding-day glow, down to a science.
Spray tans are fast, effective, and easy to customize — but they still need some planning. Here’s how to make sure you’re walking down the aisle radiant and streak-free.
3–6 months before the wedding
Book a trial tan. This gives you time to test your ideal shade and finish — matte vs. glowy, subtle vs. bronzed — and make adjustments based on how it wears. Bonus: time it with your engagement shoot or dress fitting to see how it photographs.
1 month before the wedding
Optional second trial. If you want to tweak your colour or try a rapid solution, now’s your chance. Many brides feel more confident doing a second round just to be sure.
2–3 days before the wedding
Final glow-up. This gives your tan time to fully develop and settle while still looking fresh. Avoid booking it the night before — just in case a touch-up is needed. You want the bronzer layer fully rinsed and the colour locked in before slipping into your dress.
Spray Tan Prep + Care Reminders
- Exfoliate and shave the day before, not day-of
- Avoid lotions, deodorants, makeup, and perfume before your appointment
- Wear loose, dark clothing to your appointment
- Avoid sweating or water until your first rinse is complete
- Shower gently, moisturize daily, and your glow will last through the honeymoon
Bridal Glow Timeline: UV Tanning Edition
Build your base. Boost your confidence.
For a gradual, sun-kissed glow that lasts longer, UV tanning is an excellent option if you have more time before your wedding. It's also ideal for honeymoon preparation, particularly if you anticipate spending time in the sun.
4–6 weeks before the wedding
Start slow. Begin with 2–3 sessions per week in one of our Bronze or Gold beds, depending on your skin type. We’ll help set the right time and schedule so you never overdo it.
2 weeks before the wedding
Upgrade if desired. If you’ve built your base and want to deepen your glow, this is when you can move up to our Platinum beds or fine-tune your schedule to maintain your colour.
1–2 days before the wedding
Final session. Your tan will be at peak radiance — and it’ll hold up through all the hugs, dancing, and happy tears.
UV Prep + Care Reminders
- Use a professional indoor tanning lotion — it boosts results and keeps skin smooth
- Stay consistent — the best tans build gradually
- Moisturize daily to lock in your colour
- Exfoliate gently at the start of your tanning journey, but avoid exfoliation in the final week
- Always wear SPF on your honeymoon — your tan isn’t a replacement for sun protection
Don’t forget the bridal party
Your bridesmaids, mom, and even your groom might want to glow with you — and booking as a group ensures everyone looks cohesive and camera-ready.
We can block off time specifically for your bridal party and help everyone choose the right shades and beds for their skin tones. Plus, group bookings make the experience fun, relaxing, and memorable.
You bring the dress — we’ve got the glow
Whether you choose spray tanning, UV tanning, or a mix of both, we’re here to make sure your skin looks and feels incredible for your big day. No stress, no guesswork — just expert support, tailored advice, and results you’ll love in every photo.
Still not sure where to start? Pop by for a chat or shoot us a message. We’ll help you plan the perfect bridal glow — for you, your bridal party, and your timeline.

How to build a vacation-ready base tan
Introduction
Let’s be real: nothing ruins a trip faster than a sunburn on day one.
You’ve booked the flights, planned the outfits, and counted down the sleeps. But if your plan is to roll up to the resort with bare, untanned skin, you might spend the rest of your vacation under a beach umbrella, peeling and annoyed.
That’s where a base tan comes in.
It gives your skin a head start before the real sun hits. You’ll look more even, tan more easily, and avoid going from zero to lobster in 10 minutes flat.
Here’s how to build a base tan that actually works — without rushing, overdoing it, or wrecking your skin along the way.
Why bother with a base tan?
Spoiler: it’s not just about showing up glowing.
A well-built base tan helps your skin adjust to UV gradually, reducing the chances of burns or uneven colour when you’re in stronger sun. It can also make your sunscreen work better — by giving your skin a bit more UV resilience, your SPF has less to fight off, and you’re less likely to burn with proper protection in place.
Think of it like a warm-up before a workout. You wouldn’t sprint cold — and your skin shouldn’t, either.
What a base tan can do:
- Give your skin a gradual intro to UV exposure
- Help prevent burns and uneven colour
- Increase the effectiveness of your SPF
- Let your real vacation tan build more evenly
- Start you off with a glow, not a burn
What it can’t do:
- Replace sunscreen
- Make you immune to sun damage
- Justify laying out all day with zero protection (don’t do it)
Start early — like, earlier than you think
Building real, even colour takes time. If you want to glow by the time you land, you’ve got to start before the packing phase.
Aim to start 3–4 weeks before your trip
Depending on your skin type and goals, we usually recommend 2–3 sessions per week to build colour gradually and safely. If you’re fair or new to tanning, even earlier is better.
Trying to squeeze in 4 sessions the week before you leave? Not the move. That’s how you end up red, irritated, or worse — flaking before your first beach day.
Choosing the right bed
At Arizona Tanning, we offer three tiers of UV tanning — Bronze, Gold, and Platinum — featuring premium equipment to help you safely and beautifully build your base tan before vacation. Each tier offers a different experience, and our team is happy to guide you to the perfect choice for your skin, goals, and timeline.
Here’s a closer look at each tier and the beds you can choose from:
Bronze Tier
Our most gentle option — perfect for beginners, fair skin, or anyone looking to build their glow gradually.
- Corona T40
A classic entry-level bed, ideal for building a natural, even tan over multiple sessions at a comfortable intensity.
Gold Tier
A step up in power — great for those with some colour already, or anyone looking for more noticeable results in less time.
- Corona Blush
An upgraded version of the T40 with added red light therapy for enhanced skin rejuvenation and a beautiful, radiant finish. - KBL Pure Energy
A stand-up booth that provides even, all-over colour without pressure points, helping you tan more efficiently and evenly.
Platinum Tier
Our most advanced, high-pressure beds — perfect for experienced tanners who want maximum results in fewer sessions.
- KBL 6800
A luxurious, high-performance bed that delivers deep, rich colour quickly, with advanced comfort features for a premium experience. - Saturn
A high-pressure stand-up booth designed for powerful, long-lasting colour — ideal for achieving a dark, even glow before your trip.
Pro tips for the perfect base tan
- Use a professional tanning lotion.
Dry skin reflects UV and slows down your progress — lotion helps you tan faster, deeper, and more evenly. - Start low, go slow.
Don’t jump into the longest session right away. We’ll guide you based on your skin type. - Be consistent.
Spacing out your sessions too much will slow your progress. Think of it like training — it works best when you stick to it. - Exfoliate and moisturize.
Smooth, hydrated skin develops colour better and holds onto it longer. Dry, flaky skin? Not so much. - Keep using SPF on vacation.
A base tan helps, but it’s not a free pass to skip sunscreen. Reapply regularly and stay smart in the sun.
TL;DR — Start early, go slow, and tan smart
A base tan helps you avoid burns, tan more evenly, and step off the plane already glowing. But like anything worth doing, it takes time and the right setup.
If you’re not sure which bed or package makes sense for your trip, just ask. We’re here to help you plan the perfect glow — so you can focus on making memories, not worrying about your skin.
Glow now. Thank yourself later.
Tanning without lotion? Here’s what you’re missing
Introduction
Here’s the thing: if you’re stepping into a tanning bed without lotion, you’re setting yourself up for a tan that’s uneven, fades fast, and feels… meh. It’s one of the most common mistakes we see — and one of the easiest to fix.
Tanning lotion isn’t just about smelling good or adding a little shimmer. It’s a functional product that helps your skin tan better, develop colour more evenly, and hold onto it longer. Without it, you’re basically tanning the driest, most stubborn layer of your skin — the one that’s already halfway to flaking off. That means more sessions for less payoff, and a tan that fades before you even get to show it off.
What’s actually happening when you tan
Tanning beds use UV light to trigger melanin production in your skin — the natural pigment that gives you colour. But that process also dehydrates your skin like crazy. Think about it: you’re exposing your skin to concentrated UV rays. It’s a fast, controlled version of sun exposure… and your skin feels it.
Dry skin reflects UV light instead of absorbing it. That means:
- Your tan develops more slowly
- The colour doesn’t go as deep
- And it fades faster — because the outer skin cells flake off more quickly
Here’s where lotion comes in. Indoor tanning lotions are designed to hydrate and condition your skin while you tan, so the light can actually reach the melanin-producing layers underneath. Many also contain ingredients that stimulate melanin production, giving your skin a head start before the UV even kicks in.
No lotion = tanning the dry, dull surface layer that’s about to shed
Lotion = deeper, richer, longer-lasting colour
“Can’t I just use my regular body lotion?”
Short answer? No. Long answer? Absolutely not — and here’s why:
We get it — you’ve got moisturizers at home, maybe even fancy ones. But regular lotions (even expensive ones!) are made for daily hydration, not tanning. They’re full of ingredients that interfere with UV tanning, like:
- SPF or UV blockers – even a tiny amount can prevent the light from doing its job
- Oils – these can coat the skin in a way that actually blocks absorption
- Fragrance compounds + alcohols – these dry your skin out even more under UV
- Ingredients that damage the bed – many everyday lotions can degrade the acrylic surface over time, which is a big no-no in salons
Indoor tanning lotions are specially formulated to:
- Absorb quickly and cleanly
- Support melanin production without blocking UV
- Hydrate without leaving residue
- Protect both your skin and the bed
They’re not just better — they’re designed for this exact environment. And once you try them, you’ll feel the difference immediately.
Picking the right lotion for your skin and goals
Here’s a quick breakdown of the main types:
Intensifiers
No added bronzers — just ingredients that support natural melanin production and keep skin hydrated. Great for beginners, fair skin tones, or anyone building a base tan.
Natural Bronzers
These lotions contain plant-based or mineral bronzing agents such as caramel or walnut that give you a subtle, instant tint that washes off after your next shower, while your natural tan develops underneath. Ideal if you want to leave the salon with a light glow right away.
DHA Bronzers
Contain DHA (a sugar-derived compound) that reacts with the skin to develop a deeper tan over the next few hours. These deliver the richest results — ideal for regular tanners or when you want that wow colour.
Need help choosing? Just ask — we’ll point you to something that fits your vibe and your skin type.
Pro tips for using lotion
- Always apply lotion right before you get into the bed — not at home hours before.
- Use enough to fully cover your skin, but don’t overdo it — a thin, even layer is perfect.
- Don’t forget spots like your feet, hands, and behind your knees.
- Pair it with a separate lotion made for your face — regular indoor lotion can be too heavy or pore-clogging for delicate facial skin.
The bottom line
This isn’t about “being extra.” It’s about getting what you came for.
Tanning lotion does more than just smell good. It helps you tan faster, tan better, and hold onto that glow longer — while keeping your skin smooth and happy. Without it, you’re fighting against the process (and wasting your session).
You’re investing time and money into your tan… and if you’re not using the right products, you’re wasting both.
We’ve got a curated selection in-salon — and we’re always down to help you find your perfect match.

The no-BS guide to your best spray tan ever
Introduction
There’s just something about a fresh spray tan. You walk a little taller. Clothes fit better. You catch yourself in the mirror and go, “Okay wow.” It’s an instant boost — easy, seamless, and kind of addictive in the best way.
But here’s the thing most people don’t realize: the booth might do the spraying, but you control the outcome. I’ve seen hundreds of tans, answered every “is this normal?!” post-tan email, and made all the mistakes myself. And I can tell you with confidence — the difference between a flawless glow and a patchy mess almost always comes down to prep and aftercare.
The good news? Every tip you need is right here. No fluff. No fake hacks. Just honest, tried-and-true advice from someone who’s seen (and lived) it all. Whether it’s your first spray tan or you just want better results, this is your complete guide to getting the most out of it.
Let’s glow.
Before your appointment: prep like a pro
Everything you do before your spray tan matters — probably more than you think. The products you use (or don’t use), what you wear, and even when you shave can totally change how your tan develops and fades. Here’s how to set yourself up for that flawless, even glow — no streaks, no surprises.
Exfoliate — but only with the right stuff
If you’ve ever had a patchy tan, this might’ve been the reason. Exfoliating is essential — but using the wrong scrub or shower product can mess with your results more than you think.
A lot of scrubs, body washes, and “pre-tan prep” products leave behind moisturizing ingredients like oils, silicones, or waxes. These leave a coating on your skin that feels nice... but acts like a shield. The tanning solution can’t absorb properly, and you’re left with streaks, uneven spots, or a tan that doesn’t show up at all.
Think of it like this: Have you ever washed a water bottle with dish soap, thought you rinsed it really well, and then took a sip of water that still tasted... soapy? That’s what’s happening with a lot of shower products — residue can linger on your skin, even if it’s not super obvious. And your spray tan will pick up on it.
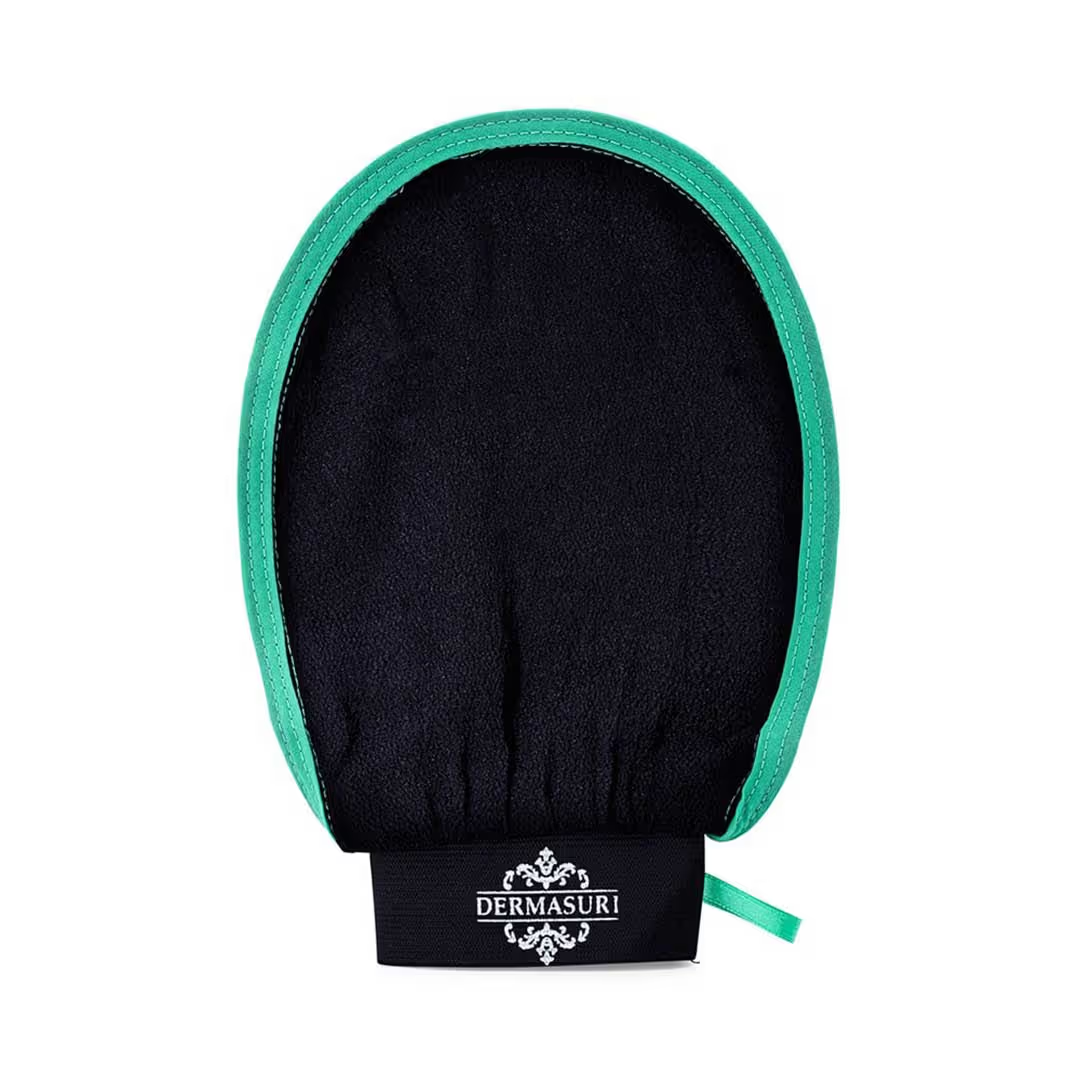
That’s why my go-to method — and what I always recommend — is a dry or damp exfoliating mitt with no product at all. I personally use the Dermasuri Deep Exfoliating Mitt (we carry it at the salon!) and it works like a dream. You can literally see the dead skin coming off — no scrubs, no oils, no surprises.
Use it the day before your tan (not the day of), and skip the lotion afterward. You want your skin clean, clear, and prepped — like a blank canvas.
Shave or wax at least 24 hours ahead
Let’s talk about those little dark dots on freshly shaved legs. You know the ones. They happen when the spray settles into open pores — and they’re so easy to avoid. All you have to do is shave or wax a full 24 hours before your tan. Simple, right?
Okay, I’ve been there. I know what you’re thinking: “There’s no way my pores will still be open after a few hours.”
YES. THEY. WILL. Trust me, from personal experience: it’s not worth it. Your tan will sit weirdly, and your legs won’t look smooth — they’ll look speckled.
Give your skin time. Shave or wax the day before, and you’ll avoid that whole situation entirely.
Skip the lotions, perfumes, deodorant, and makeup
This one’s non-negotiable. Any product sitting on your skin can block the spray and prevent it from developing properly. Even things you can’t really feel — like deodorant, SPF, or a “light” moisturizer — can cause patchiness or discolouration.
Before your appointment, make sure your skin is totally clean and dry. No lotions, no makeup, no perfume, no oils, no deodorant. If you forget, don’t panic — just let us know when you arrive and we’ll help you fix it before your tan.
Dress like you’re staying in for the night
The best spray tan outfit? Loose, dark, comfy, and not remotely cute. Tight clothes can rub against your developing tan and leave behind streaks or pressure marks — even if you don’t feel it happening. You’ll want to avoid bras, tight sleeves, waistbands, leggings, socks, and anything that clings.
My go-to? Big t-shirt, sweat pants or loose shorts, and slip-on sandals. It’s giving comfort over everything — because that’s how you protect the glow.

Right after your tan: hands off, babe
Your tan is on — now’s the time to leave it alone. This is when the solution is doing its thing, and even small slip-ups (like crossing your legs or getting caught in the rain) can mess with the final result. Think of this phase as the glow incubation period. Here's how to protect it until it’s fully developed.
Wait before showering — and keep that first rinse gentle
Your tan doesn’t stop developing when you leave the salon. It continues to deepen for hours afterward, so don’t shower too soon or you’ll cut the development short. We’ll always give you the recommended wait time (usually 6–8 hours, or less for rapid tans), and sticking to it makes a huge difference.
That first rinse? Keep it simple. Just lukewarm water — no soap, no scrubbing, no shampoo. It should be a quick, gentle rinse to remove the bronzer layer on your skin.
Don’t freak out when you see colour going down the drain — it’s just the cosmetic bronzer, not your actual tan. What’s underneath is the real deal, and it’s still developing.
Avoid sweating, swimming, or water contact
Until you’ve done that first rinse, water is the enemy. That means: no workouts, no sweating, no rain, no accidental sink splashes that trail down your arm. Seriously — even a drop of water on your arm can leave a little pale dot.
This is your excuse to cancel plans and lay low — take it.
If you’re sleeping in it, protect the tan
Wearing your spray tan overnight? Totally fine — just protect your skin (and your bedding). Wear long sleeves and pants to minimize skin-to-skin contact and prevent any bronzer from transferring. Bonus points if your sheets are dark.
Don’t stress about bronzer rub-off — it usually washes out. But those handprints from touching your leg in your sleep? Yeah, we’d rather avoid those.

Keep the glow going: your post-tan game plan
Your tan is developed — now your job is to keep it looking fresh, smooth, and glowy for as long as possible. Here’s what to do (and avoid) in the days after your spray:
Shower gently
Once your tan has developed and you’re into regular shower territory, just be mindful of how you treat your skin. The goal is to keep your glow intact, not scrub it off.
Keep your showers quick and lukewarm — long, hot ones will dry out your skin and make your tan fade faster. Use a mild body wash (nothing gritty or heavily fragranced), and skip anything that exfoliates. No loofahs, scrubbing mitts, or harsh soaps.
After you rinse, pat your skin dry with a towel. Rubbing can lift the colour — and you worked too hard for that glow to go down the drain.
Moisturize like it’s your full-time job
Dry skin = faster fading and uneven wear. Moisturized skin = smooth, glowing, and long-lasting. Apply a basic, fragrance-free lotion every day (ideally right after you shower). You want something nourishing but not too heavy or oily — we can recommend our faves.
Pro Tip: Around day 3 or 4, you can introduce a gradual tanning lotion to help extend your glow and smooth out fading. We can recommend one that plays well with your spray.
Hold off on shaving and exfoliating (for now)
Avoid shaving or using exfoliants until you’re nearing the end of your tan’s life cycle. If you do need to shave, use a fresh razor and light pressure. No shaving creams with alcohols or oils — they break down the colour.
Once your tan starts to fade (usually after 5–7 days), that’s your cue to exfoliate gently and evenly to prep for your next session. Make sure your old tan is fully removed before coming in for another — layering leftover colour with fresh solution is what causes that dry, scaly look and patchy spots.
And yes — that’s when you can bring the Dermasuri mitt back into action. It’s a game-changer for clearing off every last bit.
You’re all set
That’s it — the full lowdown on getting the most out of your spray tan. With the right prep and a little post-glow care, you’ll be looking bronzed, even, and feeling so good.
If you ever have questions (or need a quick pep talk before your first appointment), we’re always happy to help. You’ve got this — and we’ve got you.